Deploying a Flask app to Heroku
Table of contents
- Deploying a Flask app to Heroku
Foreword
I created this guide for Codecool students in the first place but it is written in a way that almost anybody with a Flask app can follow along.
If you find any mistakes or errors in this guide feel free to open an Issue on Github or even fork my repository, fix the issue and open a Pull request.
Create an account on Heroku
Create an account on Heroku.
Activate your account with the link in the email they send you.
Create an app on Heroku
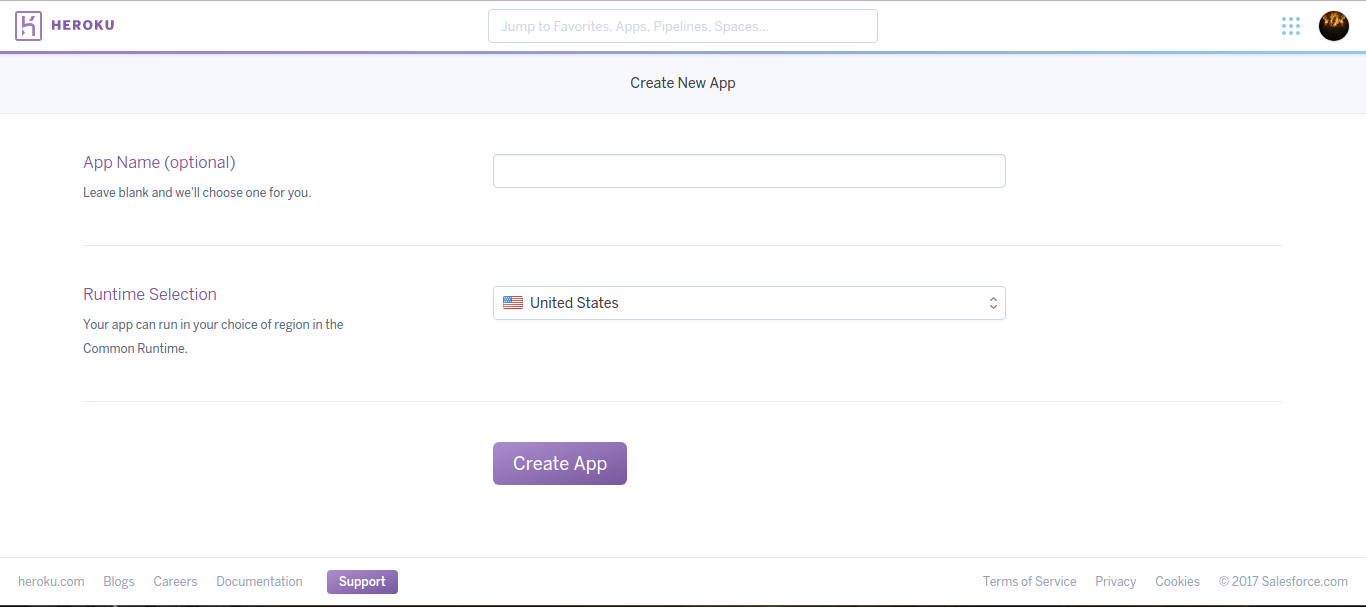
Create a new app on the dashboard.
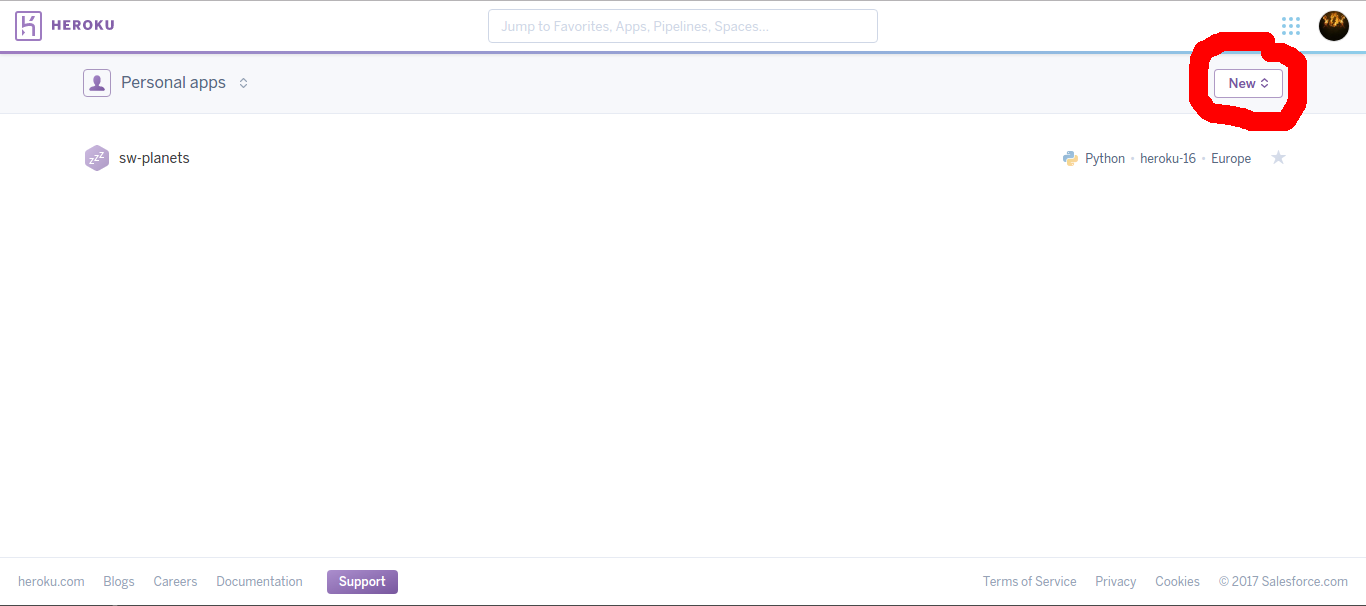
On the next screen you can select a region and type in a name if you don’t want Heroku to generate you one.
Install the Heroku CLI
To install the Heroku CLI on your local machine (linux operating system) run the command below in a terminal window.
wget -qO- https://cli-assets.heroku.com/install-ubuntu.sh | sh
(To see all the install methods for other operating systems visit Heroku’s dev center)
Install the gunicorn package
You need to install the gunicorn python package to run as your server on Heroku.
Why do you need gunicorn
You might ask:
Isn’t Flask a webserver already? Why do we need gunicorn?
Yes you are totally right but Flask is not quite suited for production use and might have issues keeping up with requests if serving directly to the web so we are using gunicorn as a sort of middleware in the WSGI server model.
Installing gunicorn
The easiest way to install gunicorn is with pip. (The command below assumes you have only one python version installed. If you have multiple versions take a look at the Pip pitfalls section.)
pip install gunicorn
Create config files
To make Heroku run your app properly you will need three configuration files (runtime.txt, requirements.txt, Procfile). All off them need to be in the root directory of your project (git repository).
Create the runtime.txt
This file contains one line with the python version you want to use.
You can find the latest supported versions on Heroku’s dev center.
So for example:
python-3.8.9
Create the requirements.txt
This file will contain all the packages and their versions that your project depends on.
For the basic Flask app you will need at least these lines (you can get your installed versions from the command pip freeze > requirements.txt):
Flask==0.12.1
gunicorn==19.7.1
itsdangerous==0.24
Jinja2==2.9.6
MarkupSafe==1.0
Werkzeug==0.12.1
If you are using Heroku Postgres as a database and psycopg2 to connect to the database and you want to make requests you should also add the following lines (versions are still from pip freeze):
psycopg2==2.7.1
requests==2.9.1
Create the Procfile
This file needs to be called exactly like this (without extension and with the uppercase ‘P’).
This file tells Heroku what kind of app you are trying to run and how to run it. The contents are pretty simple for our purposes:
web: gunicorn {app_filename}:{app_variable_name}
{app_filename} needs to be your apps main file without the .py extension this file needs to contain the initialization of the Flask object (eg.: app = Flask(__name__)) (it will be most likely called app.py or main.py).
{app_variable_name} needs to be the name of the variable containing the Flask object (eg.: app from the above example).
Side note: using gunicorn this way means that you don’t need the usual if __name__ == '__main__': block in your code as gunicorn will call run() on your app when needed.
Heroku Postgres
You can skip this part if your app does not use a Heroku Postgres database.
Installing the Heroku Postgres add-on
Go to your dashboard on Heroku and select your app. Then navigate to the resources tab and press the Find more add-ons button.
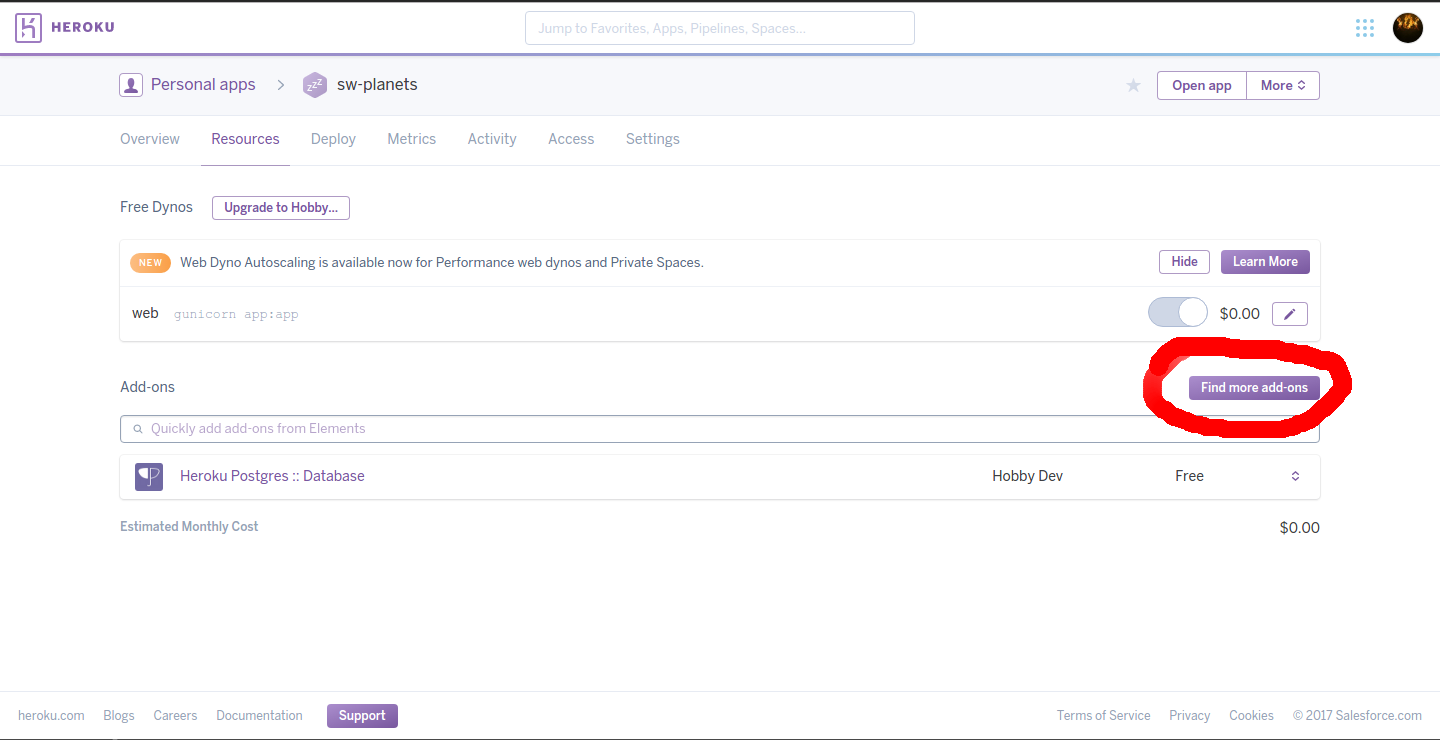
Find the ‘Heroku Postgres’ add-on and install it to your application.
Alternatively you can use command line to attach the add-on to your application. If you want to execute Heroku command through terminal you have to log in:
heroku login
This command will ask for your credentials, use the email and password that you use for your Heroku account.
Now you can add Heroku Postgres with the following command:
heroku addons:create heroku-postgresql:hobby-dev --app {heroku_app_name}
Loading up your database schema
Run the following commands in a terminal window:
heroku login
heroku pg:psql
The second command will open up a remote connection to your Heroku app database (the interface is basically identical to the standard psql program that you might run from the terminal with only a few minor features missing). Now you can run your SQL queries to set up your database. When you are done you can exit with the usual \q. Also you will need to run this command in your project directory or specify your app with the --app {heroku_app_name} option.
If you want to load sql file from the command line execute the following command:
heroku pg:psql --app {heroku_app_name} < {sql_file}
Loading the configuration in your app and connecting it to the database
If you are using python2.7 you can head over to Heroku’s dev center as the example code there will work just fine.
If you are using python3 you will need to change some things around.
import os
import psycopg2

connection_string = os.environ.get('DATABASE_URL')
connection = psycopg2.connect(connection_string)
With these changes your app should be ready for deployment.
Get your application configuration
If you are interested in your heroku app’s configuration you can check it with this command:
heroku config --app {heroku_app_name}
It lists the configuration and environment variables of your Heroku application.
Multiple or shared database
If you want to add multiple database or share your database between multiple appliaction visit Heroku’s postgres site
Deploy the app with git
Now you are ready to deploy your app.
If you haven’t already managed your project with git you will need to initialize a new repository for it.
Navigate to your project’s root directory in a terminal window an run the following commands:
git init
git add .
git commit -m "{your commit message}"
Now to add Heroku as a remote to your git repository run:
heroku git:remote -a {your app name}
You will need to be logged in to heroku to do this (you can log in with the heroku login command) and you need to specify the app name that you typed in at the beginning of this guide or the one that Heroku generated for you if you have not typed in anything (either way you can look it up on your dashboard).
The last step is to upload your app to Heroku and let it build.
You will have to specify which branch to upload (most likely it will be master).
git push heroku {branch_name}:master
Now Heroku will install all the packages listed in the requirements.txt file and then build and launch your app. If it fails please read the output it will more than likely tell you the exact problem.
For further troubleshooting you can also use the heroku logs command which will also show any error that occurred during the normal operation of your app.
Codecool students are welcome to contact me for further info/help.
Pip pitfalls
Here are a few issues that you might encounter during the installation of a package with pip.
If you have multiple python versions installed on your machine and not using a virtual environment pip will install the package for python2.7 and pip3 will install for python3.
Also if you are not using a virtual environment you will probably need to run pip with elevated rights (sudo on Ubuntu).